Overview
When you are working on a web application development using Tomcat server and Eclipse IDE, it could be painful and inefficient to create a WAR file and deploy to Tomcat after every code change. There are multiple ways to make the development process efficient.
- Create Tomcat Server within Eclipse
- Create Ant or other build script to deploy to Tomcat webapps folder
- Setup your Eclipse project to be within Tomcat/webapps folder
The simplest and most convenient is the creating a Tomcat Server within Eclipse. This article walks through the steps to configure Tomcat to run from within Eclipse.
This article uses Eclipse Kepler and Tomcat 8, but the process should be similar with other versions too.
The article does not walk through JDK, Tomcat and Eclipse installation.
Steps
- Download and install Java JDK 7 or later from Oracle website: http://www.oracle.com/technetwork/java/javase/downloads/index.html
- Download and install Tomcat 8 from Apache website: https://tomcat.apache.org/download-80.cgi
- Download Eclipse for JEE developer from Eclipse website: http://www.eclipse.org/downloads/packages/eclipse-ide-java-ee-developers/keplersr1
- Follow the URL https://wiki.eclipse.org/JDT/Eclipse_Java_8_Support_For_Kepler if you installed JDK 8 and want Eclipse to support JDK 8
- Creating Tomcat 8 server in Eclipse
a. Open Java EE perspective and access the Server tab below. You should see as the below screenshot
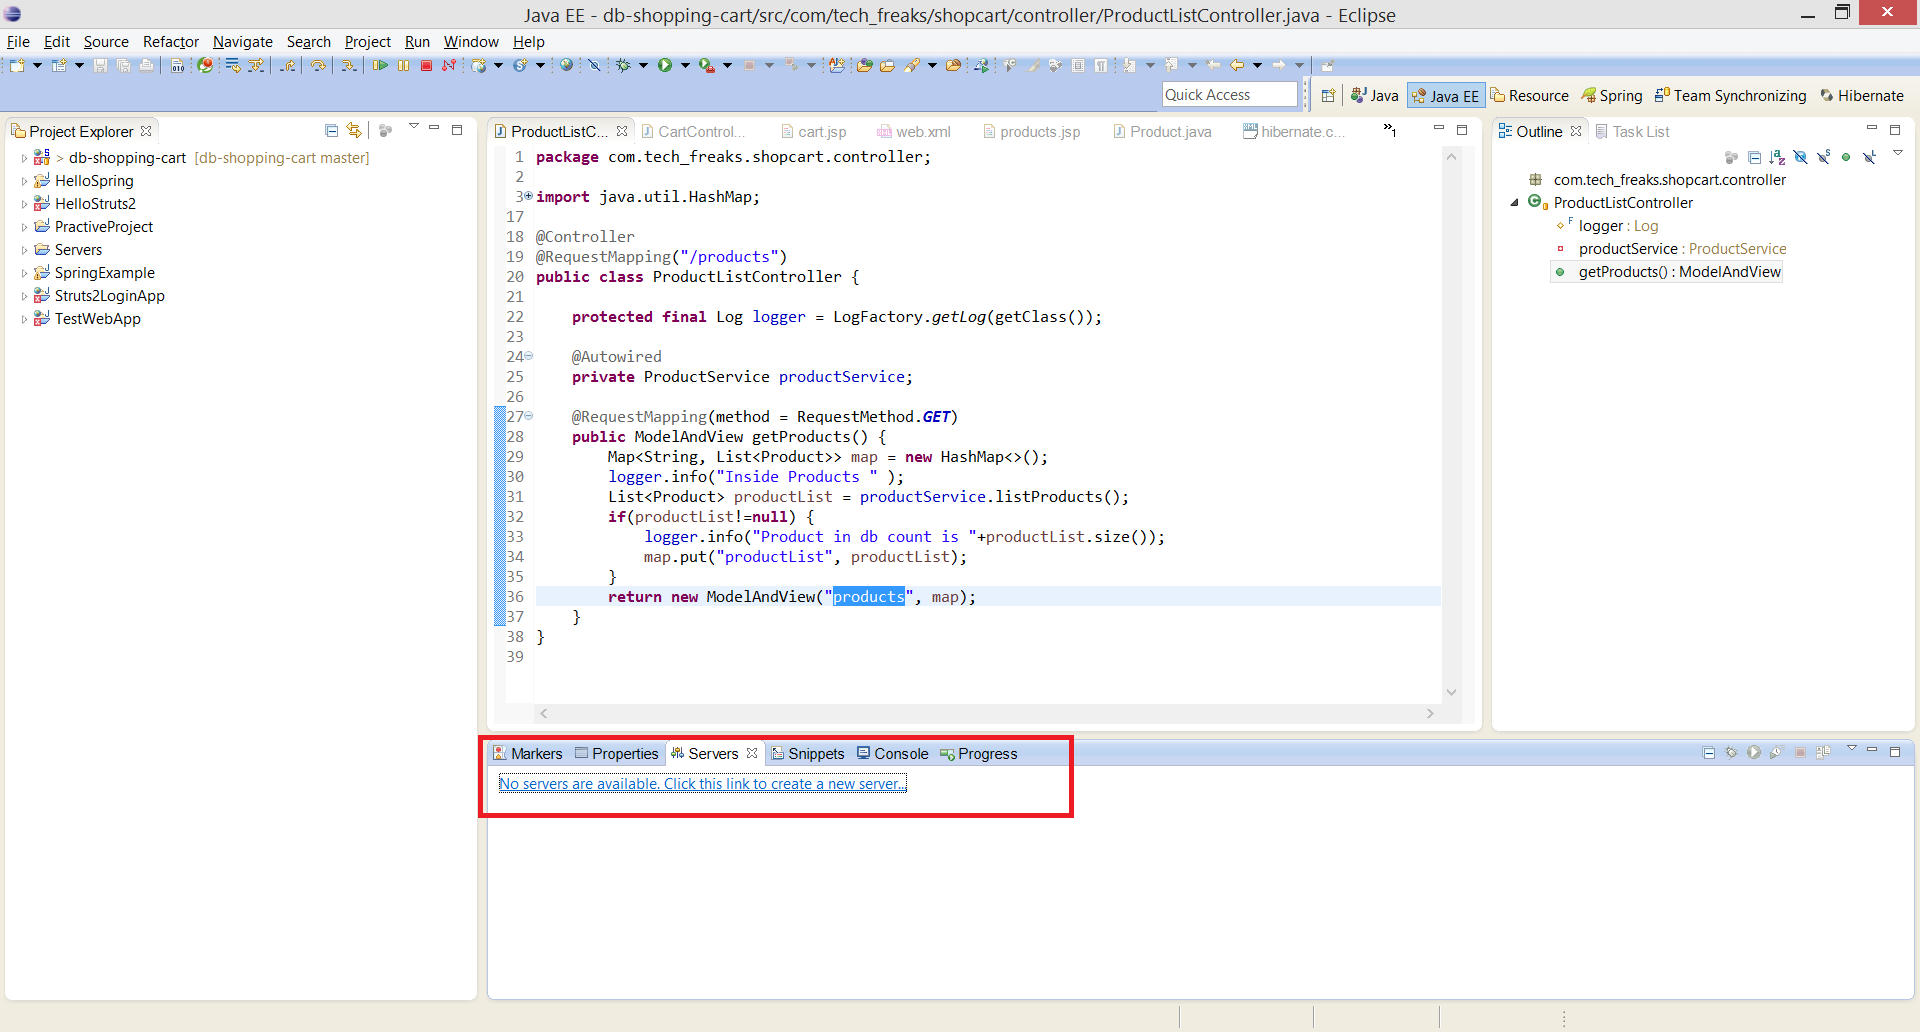
b. Click the link to create new Server as highlighted in screen above.
c. In the window that opens, click Apache and check for Tomcat 8. If you do not see, Tomcat 8 option perform the steps d to e.
d. Go to Help -> Install New Software..
e. In the window that opens, enter the URL as - http://download.eclipse.org/webtools/repository/luna
>> Under the Web Tools Platform (WTP) 3.6.0, select options "JST Server Adapters" and "JST Server Adapters Extensions". Click Next and then Accept the license agreement and finish installation.
>> Eclipse will prompt to restart and after restarting, you should be able to Tomcat 8 option
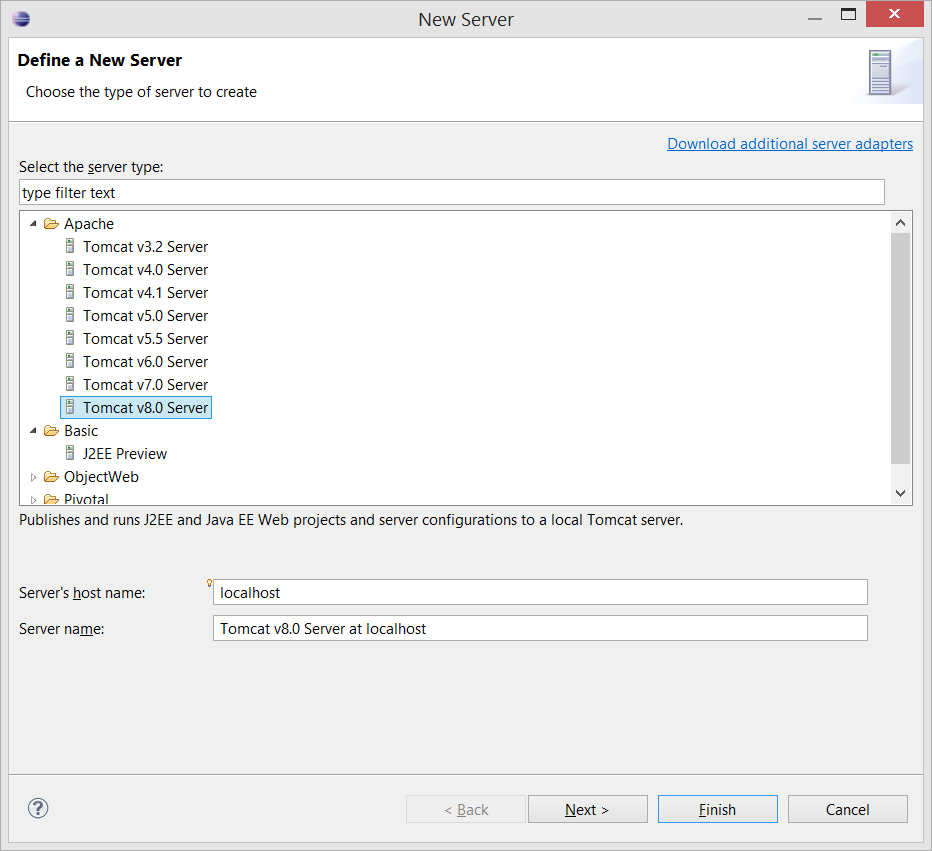
f. Now select Tomcat 8 and click next
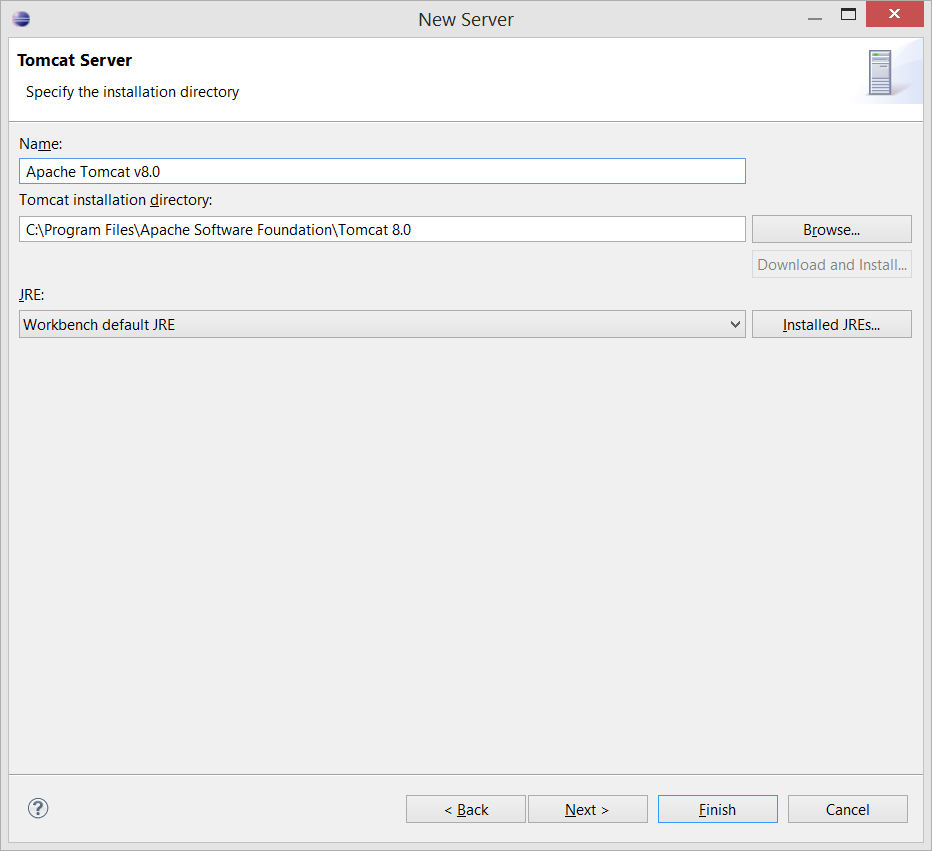
g. In the next screen, select the location of Tomcat Installation and also JDK, as shown below
h. Click next and you should see the option to add your web application. Add a test application, if you have one and click finish.
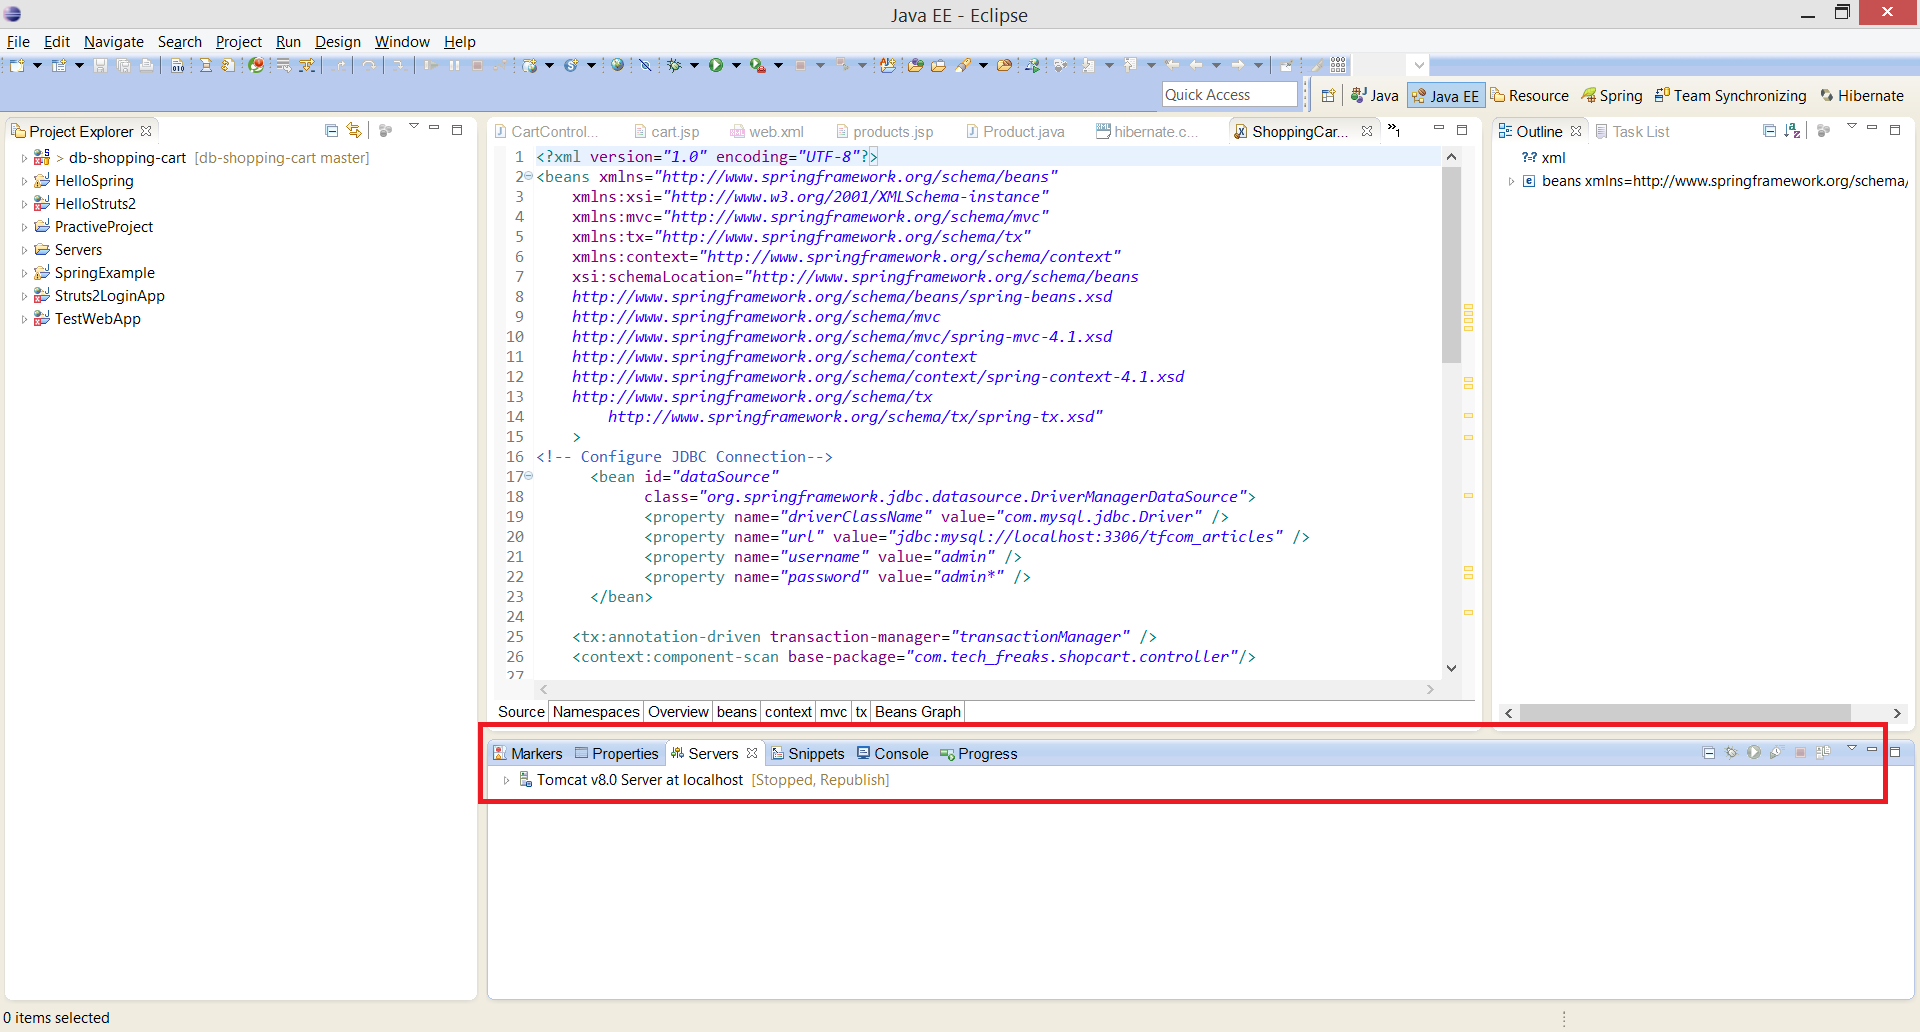
i. You should see the new Tomcat 8 server and displayed in the Server window as shown below
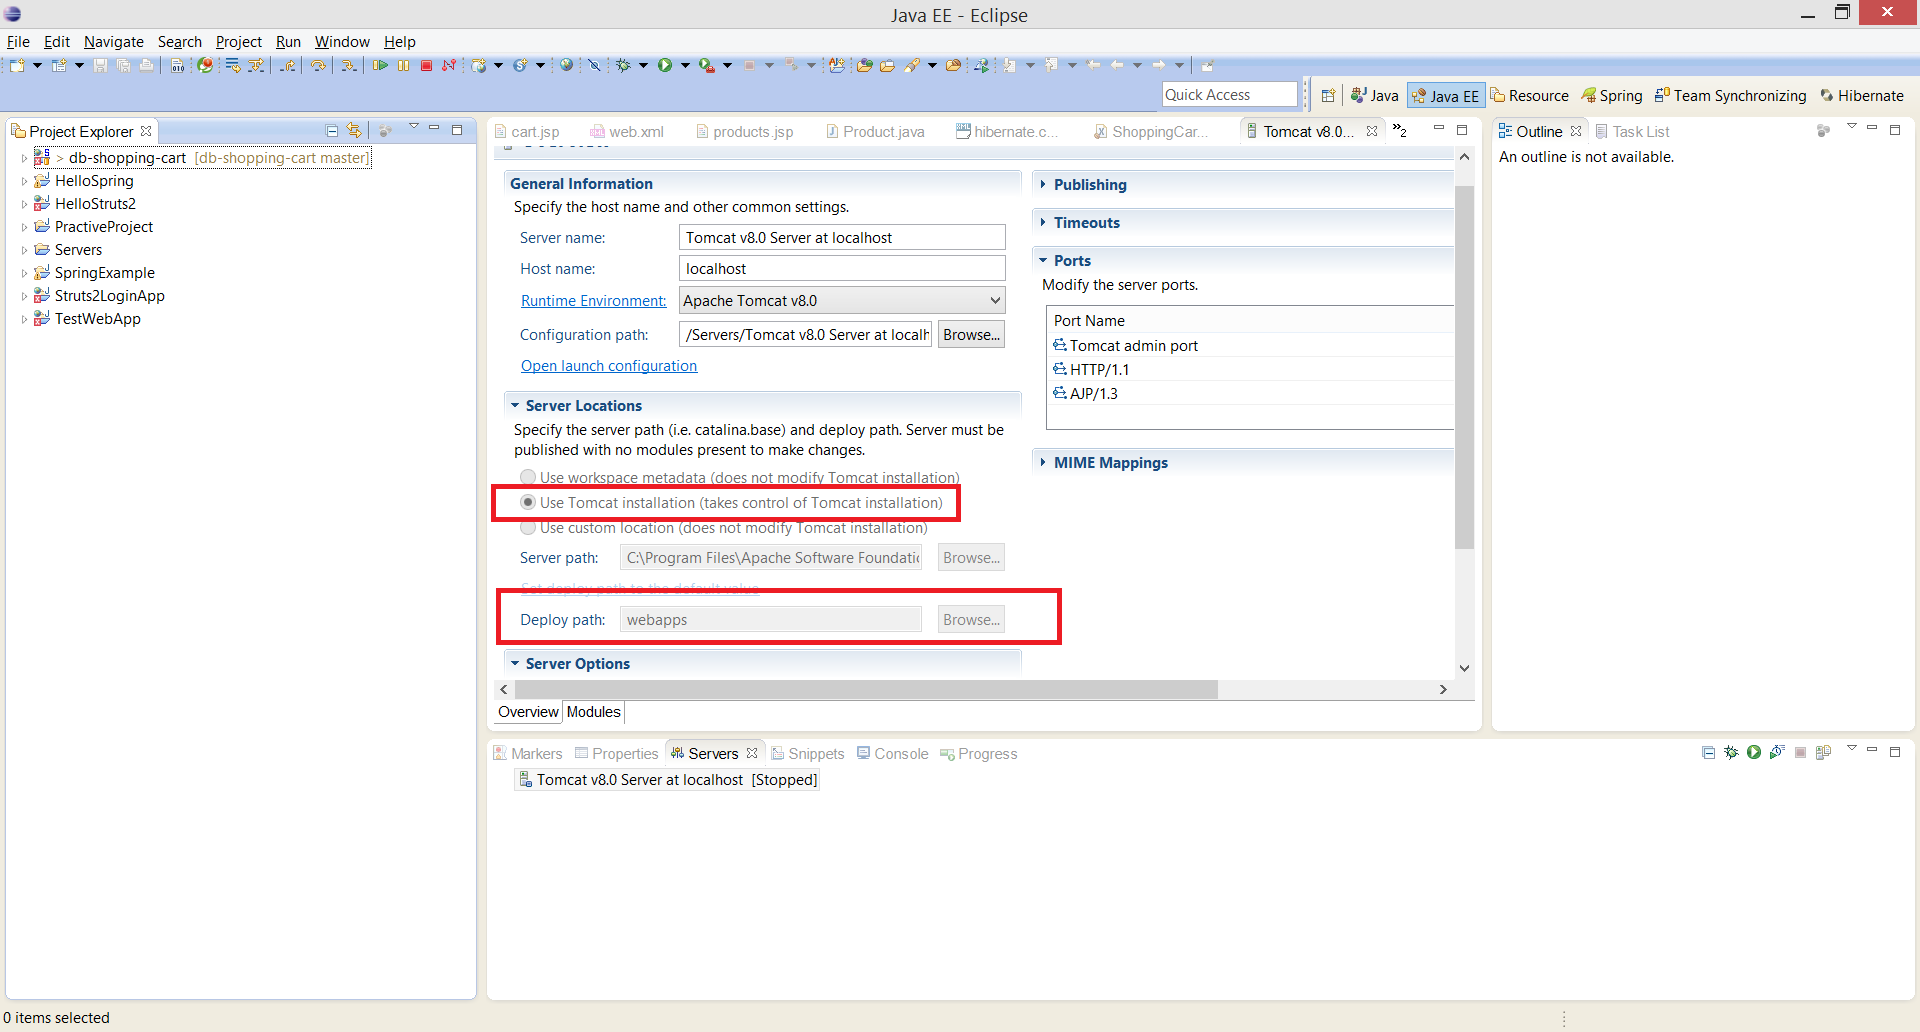
j. Double click the new Server definition and in the file which opens in Eclipse make the settings as highlighted in the below screen. The selected option uses the Tomcat installation path to work with, instead of create a separate set of files in the user folder. If you do not want Eclipse to work on the installation folder of Tomcat, you might want to select the first option 'Use Workspace Metadata'.
k. Next right click and Server and click Start. This should start your Tomcat server without any errors, in the Console.
l. Verify the Tomcat server by access the URL http://localhost:8080 and you should be able to see Tomcat screen.
This concludes the walk-through of configuring Tomcat to be access from within Eclipse IDE. Enjoy developing, deploying and testing on your development environment completely from within Eclipse !
If you notice error while starting Tomcat which says "Access Denied", it means that Eclipse is not having permission to access file in the Tomcat installation folder. You can resolve this by giving required permission to the Tomcat installation folder or by running your Eclipse as Administrator. You can also use the option 'Use Workspace Metadata', in step j, if you are unable to resolve the access issue.